How To Build A Water Purification System At Home

Let’s be real for a second. You’ve probably looked at your tap water and thought, “This tastes like a swimming pool’s disappointed cousin.” Or maybe you’ve watched a survival...
Let’s be real for a second. You’ve probably looked at your tap water and thought, “This tastes like a swimming pool’s disappointed cousin.” Or maybe you’ve watched a survival show and thought, “I could totally do that… if I ever fell into a zombie apocalypse.” Building your own water purification system at home is actually easier than assembling that IKEA bookshelf you gave up on last month.
It’s not about becoming a prepper in a bunker. It’s about having clean, great-tasting water without buying a truckload of plastic bottles. Plus, you get to feel like a mad scientist for an afternoon.
The “Why Bother?” Moment
You know that weird, faintly metallic taste from the tap? That’s your water’s way of saying it’s been on a long journey through old pipes. It’s probably safe, but it’s not exactly luxurious.
Must Read
Think of your DIY system as a spa day for your tap water. You’re sending it for a gentle detox, not a chemical peel. And the best part? You can brag about it at dinner parties without sounding completely unhinged.
Your Shopping List (No Lab Coat Required)
You don’t need a chemistry degree or a budget that requires a second mortgage. You need three things: a clean two-liter plastic bottle, a coffee filter or a clean sock (yes, really), and some activated charcoal. You can buy charcoal at a pet store or online—it’s the same stuff used in fancy aquarium filters.
If you’re feeling fancy, grab some fine sand and small pebbles from a hardware store. Pro tip: Wash the pebbles first. Nobody wants water that tastes like your driveway after a rainstorm.
Step 1: The Upside-Down Bottle Trick
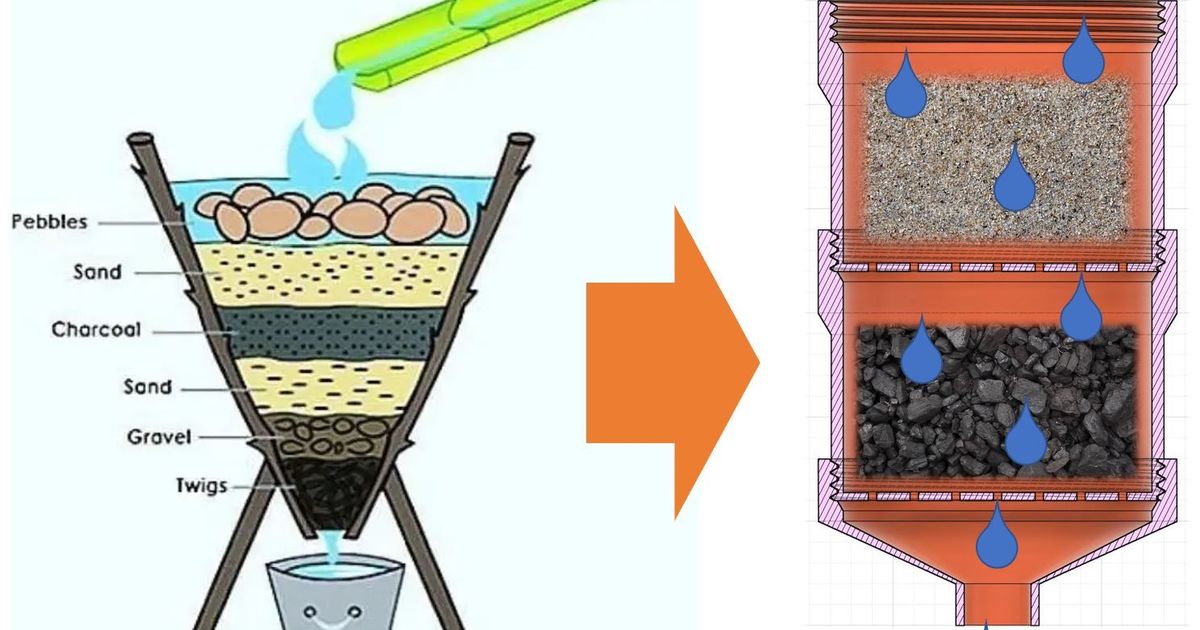
Cut the bottom off your plastic bottle. Don’t throw it away—you’ll use it as a funnel later. Turn the bottle upside down so the neck becomes the spout. Secure a coffee filter over the neck with a rubber band. This is your first line of defense against “floaty bits.”
Now, stuff the bottle with layers: a handful of pebbles, a layer of sand, then a generous heap of crushed charcoal. Cap it loosely so water drips slowly. If it drips fast, you’re not filtering—you’re just giving the water a tour of the dirt.
 DIY Water Purifier | Brillo Survival
The “Does This Actually Work?” Test
Once your layers are in, pour a glass of tap water through the top. Watch it dribble out the neck into a clean cup. It should look clearer, maybe even sparkling. The charcoal grabs the chlorine and bad flavors, while the sand catches tiny particles.
Taste it. If it still tastes like a pool party, add more charcoal. If it tastes like nothing, congratulations—you’ve just won at adulting. Feel free to do a little victory dance in your kitchen. I won’t judge.
Step 2: The Boil Backup (Because Nobody’s Perfect)
Let’s be honest: your DIY filter is great for taste and sediment, but it’s not a magic bullet for bacteria. If you’re using water from a river or a sketchy rain barrel, boil it first. Yes, it’s an extra step, but it’s better than spending the weekend glued to your bathroom floor.
Think of boiling as the “I’ve got your back” friend. The filter is the “let’s make this taste nice” friend. Together, they’re a dream team. Alone, you’re just drinking fancy mud water.
The “Oops, I Dropped It” Recovery
If your filter gets knocked over and all the layers mix, don’t panic. You haven’t broken the space-time continuum. Just wash everything, dry the charcoal in the sun, and rebuild. It’s like a Lego set that never ends.
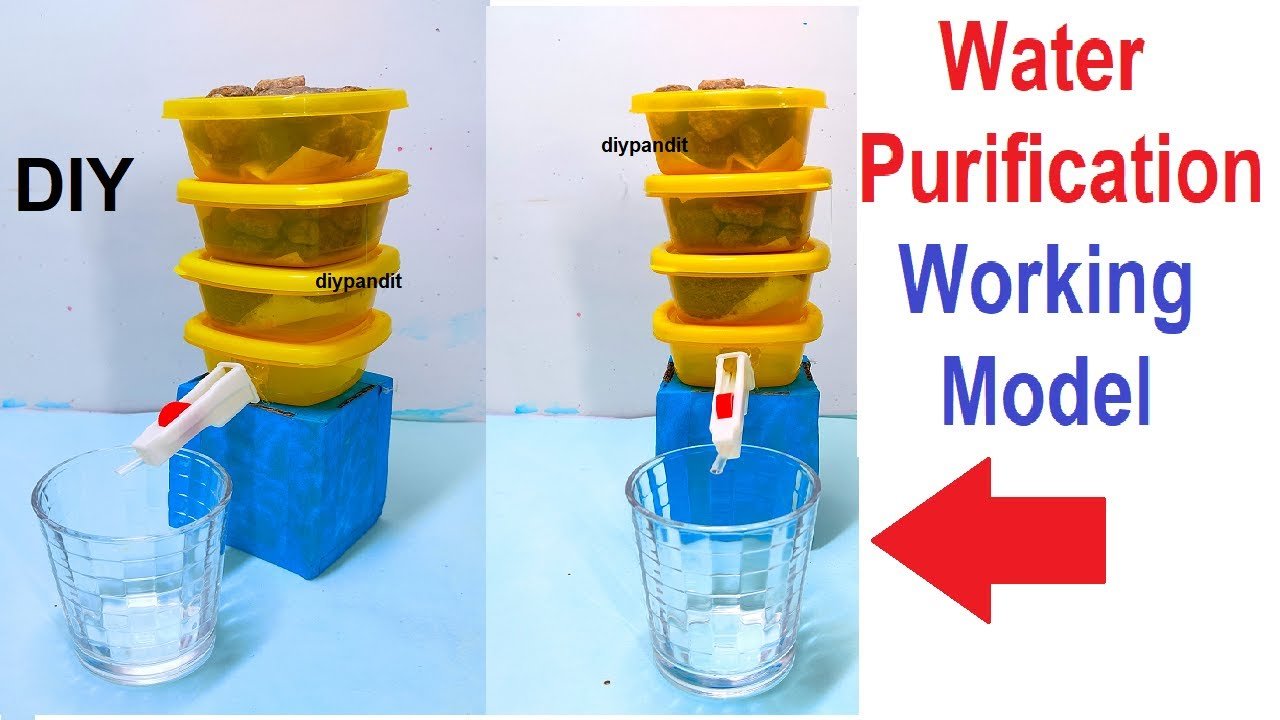 Home Made Water Filtering Systems How To Make A Homemade Water Filter
You’ll accidentally drink gritty water at least once. That’s fine. It builds character and reminds you to tighten the cap next time. I speak from experience—and from the time I proudly served my family “Swamp Chic” water.
Why This Beats Store-Bought
Store-bought filters are great, but they’re also expensive and judgmental. They sit in your fridge with their sleek plastic, silently mocking your less-organized pantry. Your DIY system is scrappy and proud. It lives on your counter like a little water-loving rebel.
Plus, you can customize it. Add a cinnamon stick to the charcoal for a spicy hint. Toss in a lemon slice before filtering for a citrus kick. Just don’t add glitter—that’s not a filter, that’s a science fair emergency.
The Bottom Line (It’s Wet, But Clear)
Building a water purification system at home is a weekend project that saves money, reduces plastic waste, and makes you feel like a pioneer. It’s not perfect, but neither is your coffee maker, and you still use that every morning.
So grab a bottle, some charcoal, and a sock you don’t love. Give it a shot. Worst case, you’ll have a funny story. Best case, you’ll never look at a faucet the same way again. Cheers to that—from your very own green-sand-bottle-madness.
