How To Hook Up Fridge Ice Maker

It all started with a bag of ice. Not just any bag, mind you, but the sad, half-melted kind you buy at a gas station at 10 PM because you forgot to fill the trays. You know th...
It all started with a bag of ice. Not just any bag, mind you, but the sad, half-melted kind you buy at a gas station at 10 PM because you forgot to fill the trays. You know the ones—they taste vaguely of freezer burn and regret. I was standing there, holding this dripping plastic hostage, thinking, “My fancy fridge has a button for this. Why am I not using it?” That’s when my journey to hook up the fridge’s ice maker began—a journey I am here to spare you from, one clumsy step at a time.
Let’s Get Real: You Might Be Overthinking This
Look, the manual that came with your fridge is probably thicker than your last tax return. And it’s written by engineers who assume you own a soldering iron. Don’t panic. Hooking up an ice maker is mostly about water and patience. If you can handle a leaky faucet without crying, you can handle this. Promise.
First, figure out if your fridge even has a built-in water line. If it doesn’t, stop right there and buy a refrigerator ice maker kit (yes, they sell those, and no, it’s not a scam). If you have a water line dangling behind your fridge like a forgotten tail, you’re golden. That’s your friend.
Must Read
Step One: The Underworld of Your Kitchen
You’ll need to pull the fridge out. Not all the way—just enough to see the back panel. Be gentle. You don’t want to scratch the floor or kink the existing water line. Side note: this is also the moment you find three lost forks, a rogue Cheez-It, and the missing lid to your Tupperware. Welcome to your kitchen’s secret museum.
Locate the copper or plastic tube sticking out from the wall. It’s usually capped off with a little plastic piece. That’s your water source. If it’s not capped, turn the water valve off first. You don’t want a surprise shower in the middle of your project. Trust me—I learned that one the wet way.
The Actual Connection: Not as Scary as It Sounds
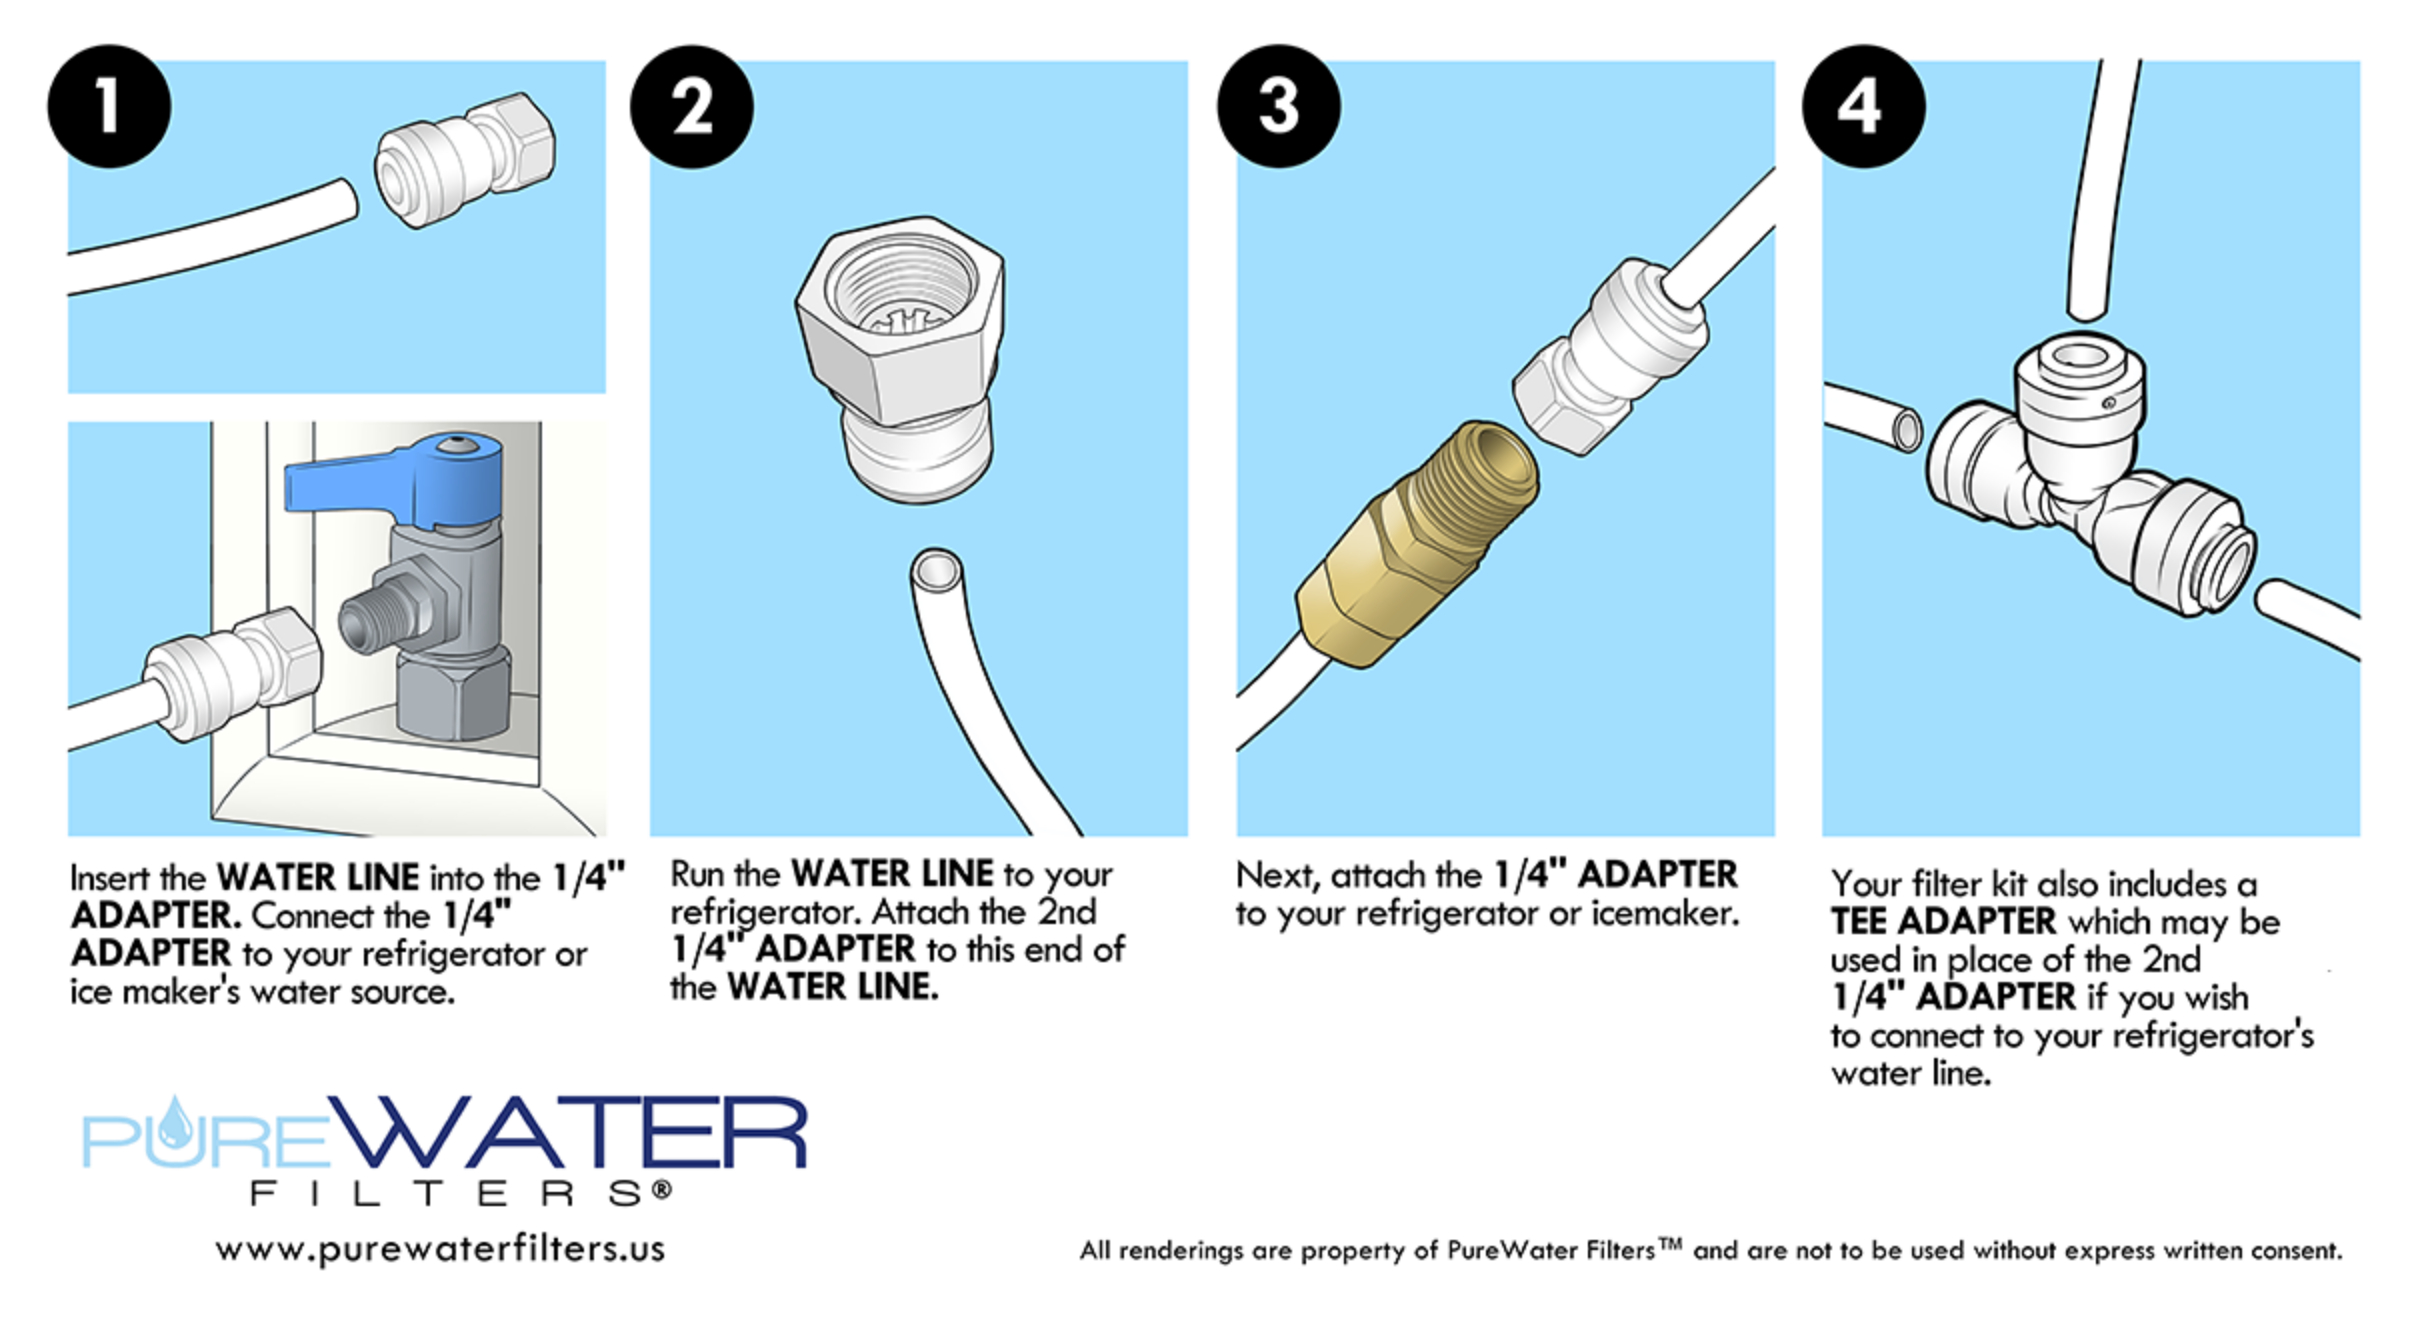
Now, take your ice maker’s water line kit (the one you bought from the store because your fridge was sold “without hose”). Most kits come with a saddle valve. This little T-shaped gadget clamps onto your existing copper pipe and lets you tap into the water supply without cutting it. It’s like a gentle, non-lethal parasite for your plumbing. Follow the kit’s instructions to attach the saddle valve—usually it’s just screws and a few turns.
 How To Connect A Fridge Ice Maker at Joy Herman blog
Once the valve is on, connect the ¼-inch plastic tubing from the kit to the valve. Push it in until you feel a click, then tighten the nut. Don’t use a wrench like you’re building a tank; hand-tight is fine. Leaks happen when you’re too macho with the tools.
Run the Tube Like You’re Wiring a Spy Movie
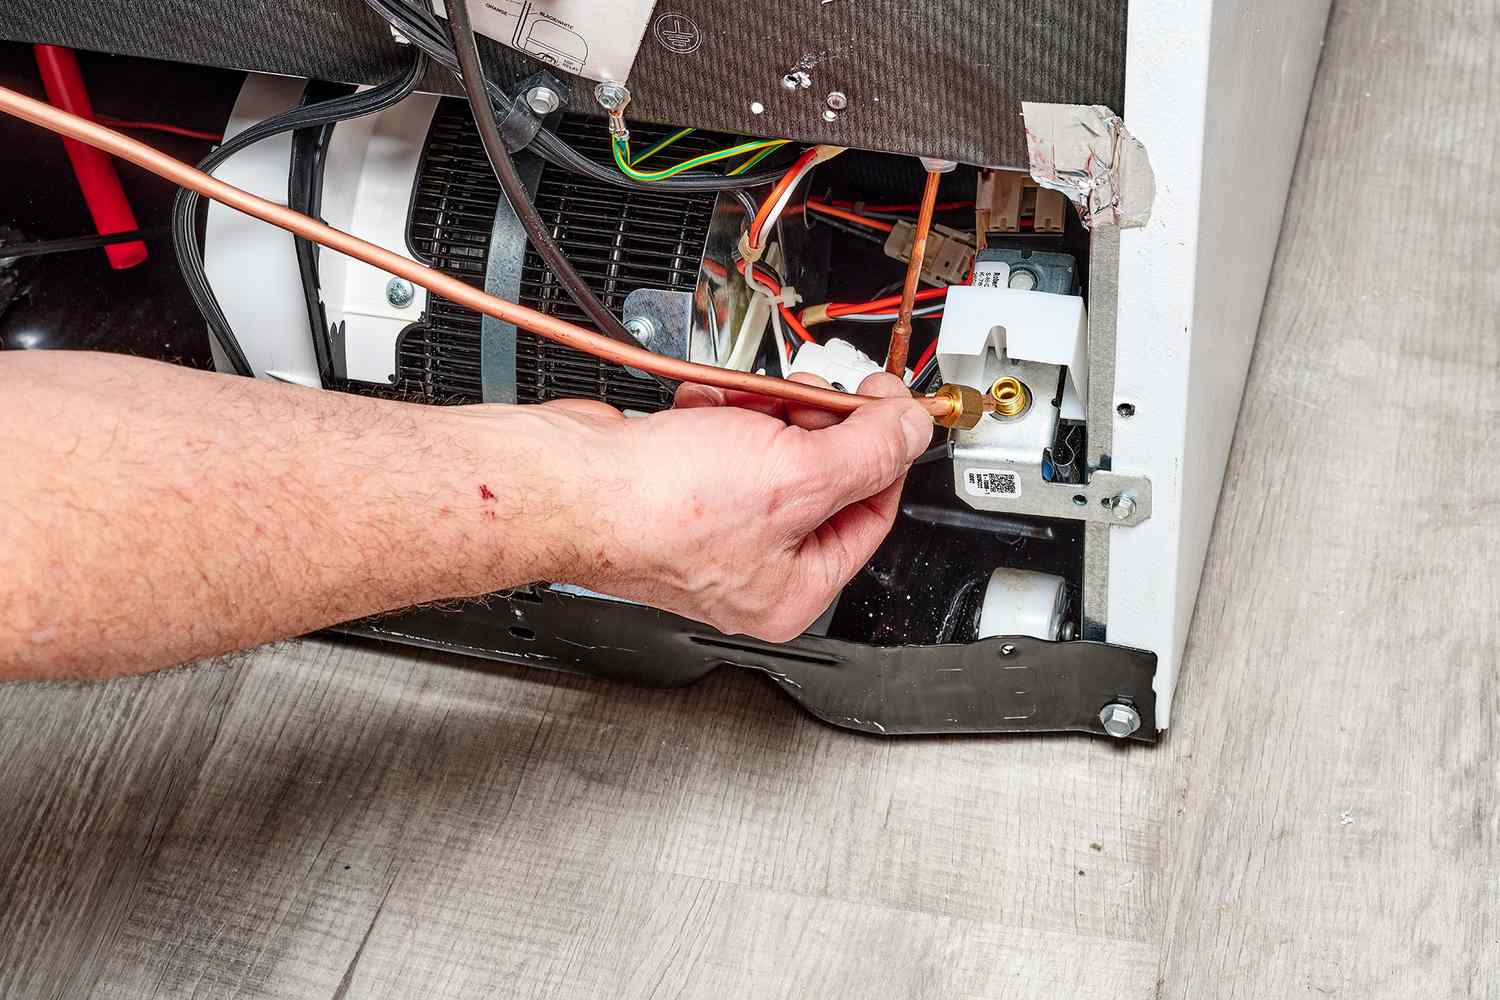
Route the tubing along the wall, behind the fridge, toward the ice maker’s inlet port. You’ll see a small brass connector on the back of the fridge—that’s your target. Slide the tubing onto that, and again, tighten it gently. Don’t kink the tube. A kink is like a clogged artery for ice cubes. If you have to bend it, make a wide loop. Your future self will thank you when you’re not fishing for cube-shaped icicles.
Before you push the fridge back, turn the water valve on slowly. Listen for hissing. If you don’t hear water, check your connections. If you hear water but see drops, tighten the nut a tiny bit more. This is the moment where you either celebrate or call a plumber. I’m rooting for celebration.
 Frigidaire Ice Maker Water Line | TAFT Independent
The Final Test: Prayers and Ice Cubes
Once everything is dry and secure, plug the fridge back in and push it into place. Now, the ice maker needs time to chill—literally. It can take up to 24 hours to make the first batch. I know, because I checked every hour like a maniac. Patience, young grasshopper. Pro tip: toss the first two batches of ice. They taste like plastic and hope.
After a day, check for your ice cubes. If they’re coming out, congratulations—you’ve officially defeated technology with your bare hands. If not, double-check the water line for kinks and ensure the ice maker switch is turned on (yes, that’s a real thing I forgot once).
One Last Ironic Truth
So now, every time I open my freezer, I see those perfect, hospital-clean ice cubes falling like little cubes of victory. No more gas station bags. No more melted regret. You can have this too. It’s a few hours of work, a little curiosity, and one good trip to the hardware store. And hey, if all else fails, you’ll at least know exactly where that Cheez-It was hiding all along.
