How To Hook Up An Ice Maker In A Refrigerator

So, you’ve bought a fridge with an ice maker. Congratulations—you’re now the proud owner of a machine that will judge you every time you reach for a bag of bagged ice. But fir...
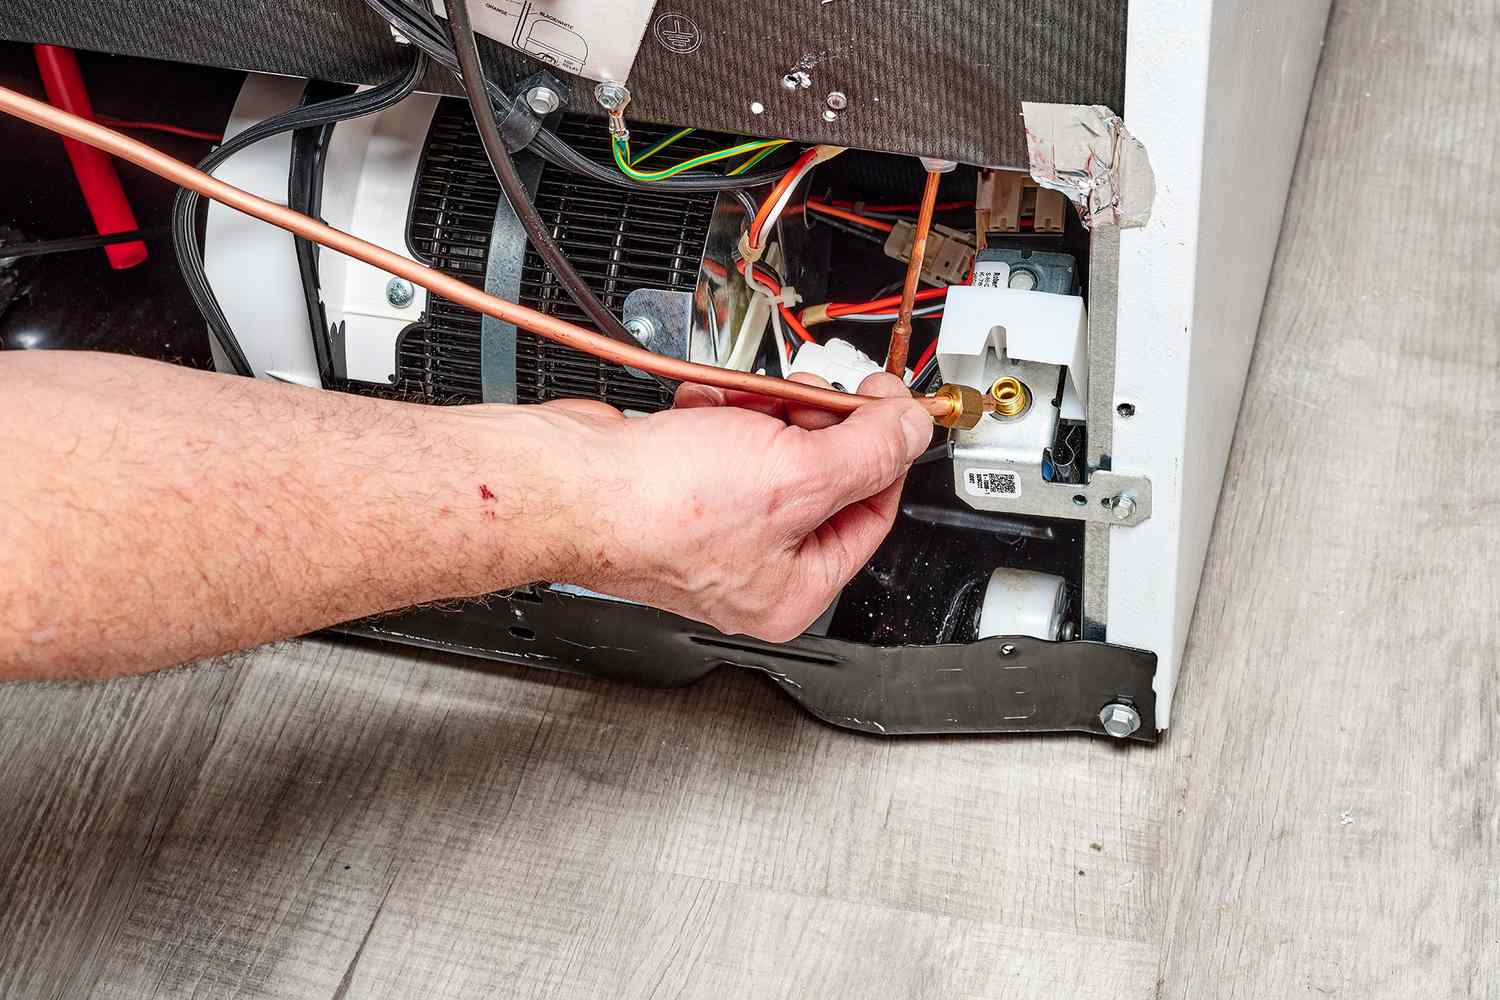
So, you’ve bought a fridge with an ice maker. Congratulations—you’re now the proud owner of a machine that will judge you every time you reach for a bag of bagged ice. But first, you have to hook the thing up. Don’t panic. This isn’t brain surgery; it’s plumbing for people who get excited about a cold drink.
The good news? You don’t need a PhD in physics—or a plumber named Gunther. Most modern fridges come with a saddle valve kit, which is just a fancy way of saying “little metal clamp that stabs your water pipe.” The bad news? You will get wet. Accept this fact now, like a baptism into the cult of crisp ice.
Step One: Find Your Water Supply (And Your Courage)
First, locate the cold water line under your sink. It’s usually the copper pipe that doesn’t burn you if you touch it. If you don’t have a cold line, congratulations—you’ve just entered a side quest involving a basement or crawlspace. Wear a headlamp and prepare to apologize to spiders.
Must Read
Pro tip: Turn off the water before you start cutting. I once forgot this step, and my kitchen looked like a splash zone at SeaWorld. Surprising fact: A tiny pinhole leak can spray 20 gallons of water per day. That’s enough to flood your floor and ruin your marriage’s “no yelling over appliances” rule.
The Saddle Valve: Your New Frenemy
Now grab that saddle valve kit. It looks like a medieval torture device designed by a plumber who hates fun. Clamp it onto the pipe, and tighten the screws until you hear a gentle click—that’s the pipe saying “please stop.” Then, turn the handle to drive a tiny needle into the pipe. You just made a hole in your plumbing, you magnificent rebel.
Surprising fact: The water pressure in your pipes is about 40-60 PSI. That’s roughly the same pressure as a garden hose aimed at a toddler’s face. Respect it. If you over-tighten the valve, you’ll create a geyser that will make you question your life choices.
Step Two: Run the Line (Like a Secret Agent)
Now you need a 1/4-inch plastic tubing. This is the “umbilical cord” for your ice maker. Unspool it carefully—it has a memory like a grumpy cat, and it will curl up. Run it from the saddle valve to the back of your fridge, hiding it under the sink or along the baseboard. If you have baseboard heating, congratulations—you’ll need to drill a hole. Don’t forget to tape a note to your drill that says “I’m sorry, future homeowner.”
 How To Connect Tubing To Your Refrigerator Ice Maker: A Guide | CyCookery
Fun tip: Use a zip tie to secure the tubing every two feet. Otherwise, the tube will flop around like a drunk garden hose, and your cat will think it’s a toy. Also, do not kink the tube. A kink is the ice maker equivalent of a blocked artery. Your ice will just sob quietly.
The Back of the Fridge: A Portal to Narnia
Pull your fridge away from the wall. Look at that mess of dust bunnies and lost Tupperware lids. Don’t panic—that’s normal. You’ll find a small brass fitting on the back of the fridge, usually labeled “water” or “ice maker 2024.” Connect the other end of your tubing to this fitting. Finger-tighten it, then give it a quarter-turn with a wrench. If you hear a squeak, you’ve done it right. If you hear a crack, you need a new fitting.
Surprising fact: Refrigerator water lines are required to be lead-free since 2014. So no, your ice won’t taste like a 1970s school water fountain. You’re welcome.
Step Three: Turn the Water Back On and Pray
Slowly open the saddle valve. Listen for the sound of water flowing, but don’t put your ear to the tube—that’s how you get a sinus rinse. Check every connection for drips. A single drip can turn into a puddle that warps your floorboards and creates a small ecosystem of mildew. You don’t want that. You want ice.
If you see a drip, tighten the fitting gently. Gently, I said. This isn’t a wrestling match. If you overtighten, you’ll crack the plastic and have to start over. And then you’ll swear loudly enough to wake the neighbors.
 How to Hook Up a Ice Maker on a Refrigerator: Easy Step-by-Step Guide
Step Four: Wait for Your Reward (Ice Cubes of Glory)
Plug the fridge back in, slide it into place, and press the “ice on” button. Your fridge will grumble and clank for a few moments—that’s normal. It’s just purging air from the line. After about 24 hours, you’ll have your first batch of ice. And it will be the most beautiful ice you’ve ever seen. You’ll take a photo of it. You’ll show your friends. They’ll pretend to care.
Surprising fact: The average ice maker produces about 3.5 pounds of ice per day. That’s enough for 40 glasses of sweet, sweet tea or roughly 14 margaritas (if you’re having a bad week).
What If Nothing Happens?
Don’t panic. Check that the water line isn’t frozen. Also, some fridges have a hidden “water on” switch inside the door. Mine had one, and I spent two hours Googling why my ice maker was “sad and bitter.” Spoiler: It wasn’t plugged in.
Finally, if all else fails, call a friend who owns tools. Or a plumber. But try the tweaking first—you’ve come this far. You’re basically a refrigeration wizard now. And if you still make a mess, remember: bagged ice is always an option. It just won’t be as smug about it.
Now go, hook it up, and become the ice god your kitchen deserves. Cheers, you beautiful, slightly leaky human.
