How To Install A Water Meter

So there I was, last Tuesday, staring at a water bill that looked like I’d been trying to fill a swimming pool with Evian. You know that feeling when you see a number so high...
So there I was, last Tuesday, staring at a water bill that looked like I’d been trying to fill a swimming pool with Evian. You know that feeling when you see a number so high you actually check the date to make sure it isn’t a joke? Yeah, that was me. Turns out, my old water meter had been slowly lying to me for years, like a tired politician who just won’t retire.
Why even bother installing your own meter?
Look, calling a plumber is easy, but it’s also a great way to burn fifty bucks before they even touch a wrench. I’m not saying you should do everything yourself—please don’t rewire your house after reading this—but a water meter swap is a legit DIY weekend project. You’ll save money, feel like a homeowner superhero, and finally understand what that weird valve under your sink actually does.
(Side note: If you have the water running while you read this, turn it off. You’re paying for that trickle of water you’re not even using, you generous soul.)
Must Read
What you’ll actually need—besides misplaced confidence
First, buy the right meter. Head to a hardware store and ask for a meter that matches your pipe size. They usually come in ⅝-inch or 1-inch, and getting the wrong one is like buying a left-handed glove for your right hand—frustrating and pointless. You’ll also need two adjustable wrenches, Teflon tape, a bucket, and a towel. And coffee. Never start plumbing without coffee.
Before you touch a pipe, shut off the main water valve to your house. That’s usually a big wheel near the street or in your basement. Turn it clockwise until it stops—don’t force it like you’re trying to open a stubborn pickle jar.
Step 1: Drain the system (and your expectations)
Open the lowest faucet in your house—usually a basement spigot or an outside hose—to let water drain out. If you skip this, you’ll get a surprise shower when you disconnect the old meter. And not the fun kind. Wait until the water stops dripping, then close that faucet.
Now, place your bucket under the meter. Those pipes are going to release a few cups of water, and trust me, you don’t want that soaking your basement floor. (Pro tip: wear shoes you don’t mind getting wet. You will get wet. It’s a law.)
Step 2: The big yank—removing the old meter
Use one wrench to hold the pipe steady, and the other to loosen the nuts on both ends of the meter. Most meters have union nuts that unscrew counter-clockwise. If they’re stuck, spray some WD-40 and curse softly. Do not use brute force—you can snap the pipe, and then you’ll be calling a plumber anyway, crying into your phone.
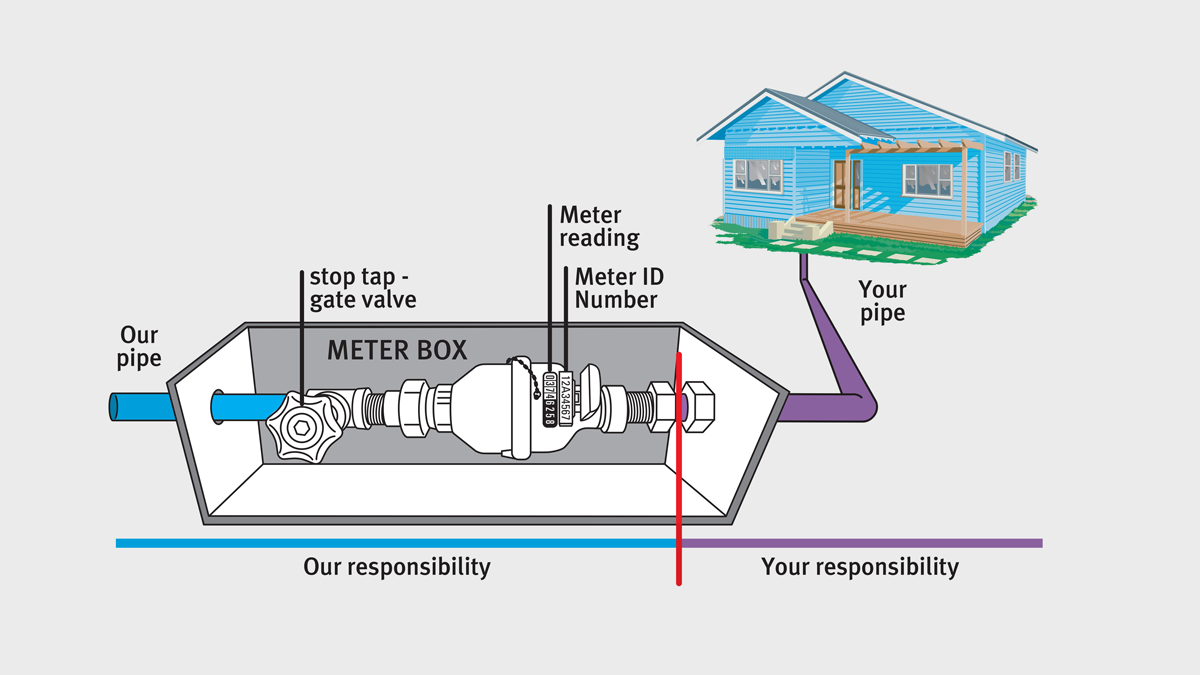 How To Apply For A Water Meter | Detroit Chinatown
Slip the old meter out. Give it a dirty look—it deserves it. Now, clean the threads on both pipe ends with a rag. Any gunk or old tape will ruin the new seal, and leaks are the enemy.
Step 3: Dress it up with Teflon tape
Wrap Teflon tape clockwise around the male threads of both pipe ends. Yes, clockwise. If you wrap it backwards, the tape will peel off when you tighten the nut, and you’ll be left with a weeping connection. Wrap it three or four times, nice and snug, like you’re tucking a toddler into bed.
Slide the new meter into place. Make sure the arrow on the meter points in the direction water flows—toward your house, not back toward the street. That arrow is the meter’s way of saying, “This isn’t a two-way street, pal.”
Step 4: Tighten like you mean it
Hand-tighten the union nuts first, then use your wrenches to give them a quarter-turn past hand-tight. Don’t over-crank them; you can crack the meter’s brass housing. Brass is tough, but it’s not invincible. (Think of it like handshake firmness, not a death grip.)
Now, slowly turn the main water valve back on. Watch for drips at the connections. If you see a single teardrop, tighten that nut a smidge more. If you see a stream, you messed up—turn the water off and redo the tape.
 How To Apply For A Water Meter » Spiteleader
Step 5: The victory lap
Once everything is dry, check inside the meter’s little display window. You should see a tiny triangle or spinning wheel. That’s the meter counting your water usage. It’s also silently judging you for that 20-minute shower you take. Let it judge; you just saved yourself a hundred bucks in labor.
Go wash your hands—you’ve earned it. And if you notice the water pressure is lower, it’s not your fault. It’s probably just the city’s infrastructure being old. (Or you forgot to open the main valve all the way. Check that first.)
What if it leaks tomorrow?
Don’t panic. Most leaks are just loose nuts that need a little nudge. If you see water beading at the connections after 24 hours, just snug them up again. If water starts spraying like a broken fire hydrant, shut off the main valve immediately and call a pro. No shame in admitting when you’re out of your depth—I once tried to unclog a toilet with a coat hanger and ended up replacing the whole bathroom floor. We all have our limits.
Remember, you’re not a plumber, but you’re a person who’s willing to try. And that’s way cooler than paying someone else to do it for you. Plus, now you have a story to tell at parties: “Oh, that old meter? Yeah, I installed it myself. You’re welcome, planet Earth.”
(Final side comment: Check your local water company’s rules before doing this. Some areas require a permit or a licensed professional. Don’t make this article the reason you get a fine. I’m not bailing you out.)
