How To Wash Water Dispenser

Let’s be honest: we often treat our water dispensers like silent, faithful water bison. We fill them, we drink from them, and we completely forget that they need a spa day, to...
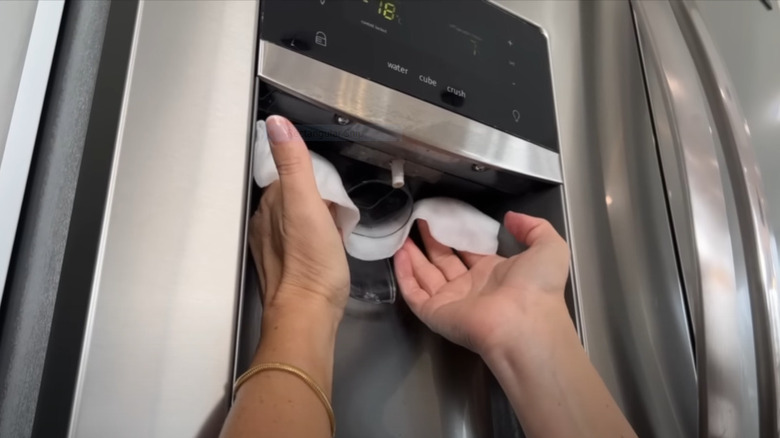
Let’s be honest: we often treat our water dispensers like silent, faithful water bison. We fill them, we drink from them, and we completely forget that they need a spa day, too. That cool stream of hydration? It’s traveling through a tiny ecosystem that, if neglected, turns into a science experiment you don’t want to drink.
But fear not. Washing your water dispenser isn’t a chore—it’s a ritual of self-respect. Grab a sponge, put on your favorite playlist, and let’s turn this mundane task into a satisfying moment of modern zen.
Why You Should Do This (Besides the Obvious Grossness)
Your dispenser is a magnet for biofilm, that slimy, invisible layer of bacteria that loves a moist, dark hallway. Think of it as the uninvited house guest who never leaves until you spray it with vinegar.
Must Read
Studies show that neglected dispenser nozzles can harbor more germs than a pet’s water bowl. Don’t panic—just take action. A clean dispenser means better-tasting water, fewer weird aftertastes, and a lower chance of a surprise tummy ache.
The Myth of “Self-Cleaning” Machines
Some dispensers say “self-cleaning.” This is a polite fiction, like saying your car “self-washes” when it rains. The UV lights and filters need help. You are the real cleaning technology here.
What You’ll Need (The Modern Warrior’s Arsenal)
Skip the bleach. You don’t need a hazmat suit—just two kitchen heroes: white vinegar and baking soda. They’re the John Wick and The Bride of natural cleaning: efficient, classic, and slightly intimidating.
- White vinegar (distilled, not flavored—no one wants salad-water)
- Baking soda (the gentle scrubber of champions)
- A soft sponge or cloth (no steel wool, please—you’re not scrubbing a grill)
- A long bottle brush (for the nooks and crannies)
- Clean towels and a bucket
Step 1: Unplug and Empty (The Digital Detox)
First, unplug the dispenser. You don’t want to mix electricity with water—that’s a horror movie intro. Then, remove the water bottle (or empty the tank). Pour out the leftover water like you’re saying goodbye to stale energy.
Pro tip: use that leftover water to water your plants. They don’t judge, and they appreciate the minerals. Waste not, want not.
Step 2: The Great Disassembly
Take the drip tray off. Remove the nozzle. If it’s a bottom-loading dispenser, unscrew the tank lid. You’re basically performing minor surgery on your hydration station. Every part that touches water should come off and meet its vinegar destiny.
Label the parts with your phone’s camera if you’re forgetful. Admire the engineering. It’s a mini plumbing system that works for you—honor it with attention.
 How to Clean a Water Dispenser: 10 Steps (with Pictures) - wikiHow
Step 3: The Vinegar Bath (Spa Treatment, Not a Punishment)
Mix a solution of one part vinegar to three parts water. Fill the internal reservoir with this mix. Let it sit for 15 to 20 minutes. Vinegar is a natural acid that dissolves mineral scale and kills bacteria without leaving chemical residue.
Run half of the solution through the dispensing spouts. Let the liquid come out and linger. It’s like a detox for your dispenser. The smell will be strong, but that’s the smell of victory.
A Note on the Smell
Yes, your kitchen will smell like a pickling factory for a bit. Open a window. Burn a candle. Pretend you’re making artisanal cleaning products. The smell fades faster than your fear of commitment.
Step 4: Baking Soda Salvation (The Gentle Polish)
For the drip tray, nozzle, and exterior, make a paste of baking soda and water. Scrub gently. Baking soda is a micro-abrasive that lifts grime without scratching the plastic. It’s the exfoliating face wash of the dispenser world.
Don’t forget the little drain hole where stagnant water collects. That’s where the bad vibes hang out. A cotton swab dipped in baking soda paste is your secret weapon.
Step 5: The Grand Rinse (The Final Waterfall)
Empty the vinegar solution. Wash all removable parts with warm, soapy water, then rinse thoroughly. Fill the reservoir with fresh water and dispense two full cycles—flush, flush, flush. You’re washing away the vinegar’s ghost.
Taste a small glass. It should taste like pure, neutral life. If it tastes like pickles, rinse again. Patience, grasshopper.
 How to clean a water dispenser 10 steps with pictures wikihow – Artofit
Step 6: Air Dry (The Cool Down)
Let everything air dry completely before reassembling. Wet parts attract mold faster than a damp towel left in a gym bag. Dry is divine.
Wipe the exterior with a microfiber cloth. Admire the shine. You just gave your appliance a second youth.
Fun Fact: The Origin of the Water Cooler
Did you know the first electric water cooler was patented in 1906 by a man named Luther Haws? He designed it for schools so kids wouldn’t drink from a shared tin cup. Now, you’re continuing that legacy of hygiene. You’re a sanitation time traveler.
How Often Should You Do This?
For a top-loader with a 5-gallon bottle: clean every 6 to 8 weeks. For a bottom-loader: every 4 to 6 weeks, because those internal tanks hide more mystery. If you drink tap water through a filter, stick to the shorter schedule.
Set a calendar reminder called “Water Dispenser Rebirth.” Don’t argue with the reminder. It knows best.
The Final Sip: A Reflection on Flow
Here’s the thing: we live in a world that constantly pushes hydration, optimization, and wellness. But wellness isn’t just what we put into our bodies—it’s the vessel we pour it from. A clean dispenser is a quiet statement: I care about the small things.
And those small things? They become the large things. The glass of cold water at 2 PM, the refill after a workout, the peace of mind that you’re not sipping yesterday’s science project. Cleaning is caring.
So the next time you press that lever and hear the gurgle of fresh, clean water, pause. Smile. You earned that sip. Your dispenser is clean, your habits are sharp, and you’re ready for anything—one crystal-clear glass at a time.
