Install Whole House Water Filtration System

So, you’re thinking about drinking water from your tap without making that face. You know the one—the squinty, suspicious, “did the cat just dip a paw in this?” expression. We...

So, you’re thinking about drinking water from your tap without making that face. You know the one—the squinty, suspicious, “did the cat just dip a paw in this?” expression. Welcome to the club. I’ve been there, and let me tell you, installing a whole house water filtration system is life-changing.
Let’s be real: bottled water is a racket. It tastes fine, but you’re basically paying for fancy plastic that’s probably older than your first smartphone. And those pitcher filters? They’re like putting a band-aid on a broken pipe. They help, sure, but they can’t fix everything.
Why Go Whole House?
Imagine every single water source in your home—your shower, your washing machine, your kitchen sink—getting the same VIP treatment. That’s the whole house vibe. It’s not just about drinking; it’s about bathing in water that won’t turn your hair into straw or leave your skin feeling like sandpaper.
Must Read
Have you noticed those white crusty spots on your dishes? That’s hard water laughing at you. A whole house system kicks its butt. No more scrubbing spots off glasses—just pure, evil-free dishes.
The Great Before & After
Before I installed mine, I was a filter skeptic. I thought, “How bad can tap water really be?” Then I cut open my old fridge filter. It was brown. Brown. And not a charming shade of beige. We’re talking “mud puddle after a storm” brown. I almost cried.
After installation? Game over. The water tastes like it came from a mountain spring—but without the extra cost of buying little plastic bottles. Plus, my morning coffee now tastes like a hug from a barista, not a punishment from a chemistry lab.
What You’ll Need (And It’s Not Wildly Complicated)
First, you need a main water line access point. That’s the pipe where water enters your house. It’s usually in the basement, garage, or that creepy crawlspace you avoid. Don’t panic—you don’t need a PhD in plumbing.
You’ll buy a filter system (I recommend one with carbon block and sediment stages—fancy words that mean “it catches the gross stuff”). You’ll also need a few wrenches, Teflon tape, and maybe a friend who owes you a favor. Seriously, bribe them with pizza.
The Step-by-Step (Minus the Nerd Stats)
Turn off the water at the main shutoff valve. This is the most critical step. Unless you enjoy turning your basement into an indoor swimming pool? No? Okay, good. Drain the pipes by opening a faucet downstairs.
Cut the main water line—carefully! Use a pipe cutter. Gently measure and mark where your filter housing will sit. Then connect the inlet and outlet of the system with the supplied fittings. Wrap those threads in Teflon tape like you’re wrapping a birthday present for a perfectionist.
Tighten everything by hand, then give it a final tug with a wrench—but don’t Hulk-smash it. Slowly turn the water back on. Check for drips. If you see a tiny leak, you’re not a failure. You’re a hydraulic engineer in training. Tighten it a bit more.
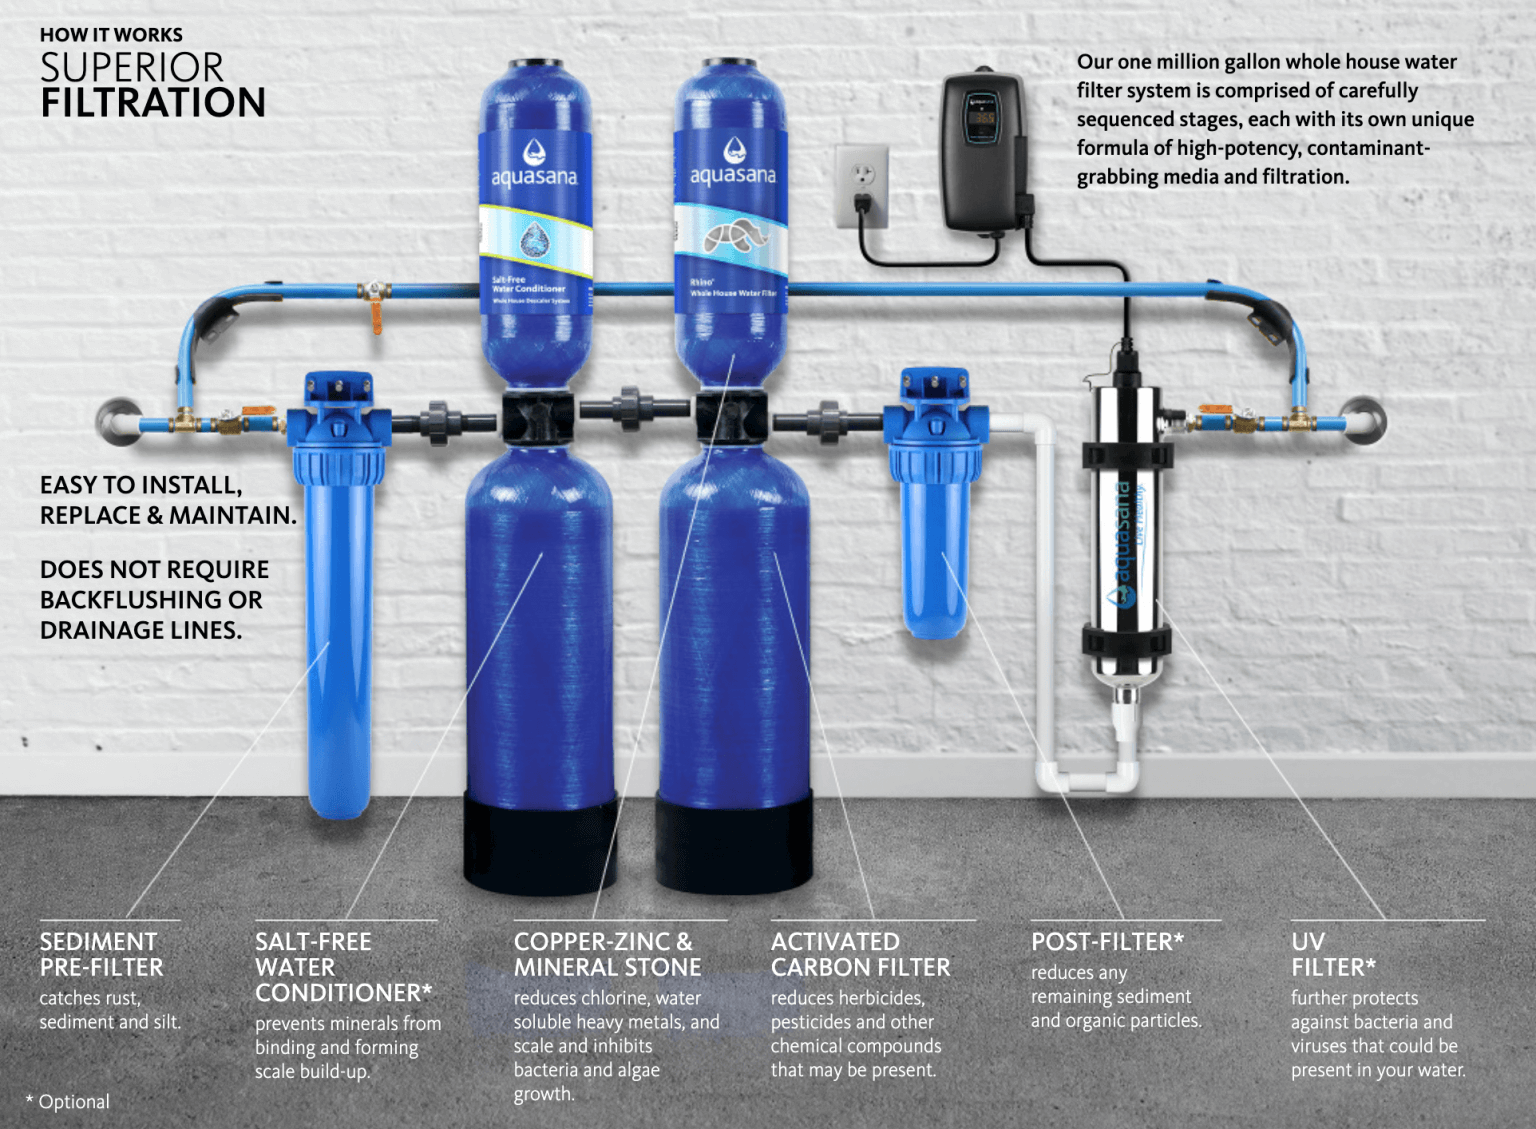 Aqua Filter Installation at Nancy Sheridan blog
But Is It Hard to Maintain?
Nope. Most systems just ask you to swap out a filter cartridge every 3 to 6 months. That’s less often than you change your toothbrush, and way less drama than fighting with a Brita pitcher at 10 PM. The replacement filter costs about the same as a decent 12-pack of craft beer—and your body will thank you more.
One pro tip: prime your system by running the faucet for 10-15 minutes after installation. The water might look cloudy at first. That’s just trapped air bubbles being dramatic. Give it a minute. They’ll clear up like a bad mood on a Friday.
The Real-World Wins (You’ll Notice Fast)
Your skin will stop feeling like you’re wearing a tight glove of minerals. Your clothes will come out of the wash softer—no more starchy jeans that could stand up on their own. And your water-using appliances? They’ll live longer. Less scale buildup, fewer “uh-oh” repair bills. Your dishwasher will adore you.
Speaking of appliances, that pesky limescale on your showerhead? Gone. It’s like magic, except the magic is science and a few hundred dollars. Worth every penny.
Should You DIY or Call a Pro?
Here’s the truth: if you’ve ever successfully assembled IKEA furniture without leftover screws, you can do this. Most of us can. The instructions are straightforward, and YouTube is basically a free encyclopedia of pipe-cutting wisdom. But if you get a funny feeling in your gut—like “maybe this is above my pay grade”—call a plumber. It’s cheaper than fixing a flooded laundry room.
If you hire a pro? Expect to pay around $150–$300 for installation (plus materials). That’s a steal for years of great water. Plus, you get to play the “I’m a smart homeowner” card at dinner parties.
The Bottom Line (No Sales Pitch, Just Real Talk)
Look, I’m not saying your life will be perfect after this. You’ll still have to do taxes. You’ll still stub your toe on the coffee table. But your water? It’ll be flawless. No more chlorine aftertaste. No more chalky residue. Just clean, crisp H₂O that makes your morning ritual feel like a spa visit.
So go ahead. Buy that system. Bribe a friend with pizza. Spend a Saturday getting a little dirty. And when you take that first glass of filtered water, smile. You did that. And it tastes pretty great, doesn’t it?
