How To Use Water Softener

So, you’ve got a water softener. Or maybe you’re thinking about getting one. Either way, you’re about to become the ruler of your own personal hydration kingdom. But how do yo...
So, you’ve got a water softener. Or maybe you’re thinking about getting one. Either way, you’re about to become the ruler of your own personal hydration kingdom. But how do you actually use the thing without turning your basement into a science experiment?
First, Let’s Meet Your New Best Friend
Your water softener is basically a wizard in a metal box. It takes that nasty, hard water—full of calcium and magnesium—and swaps it for nice, soft sodium. This is a good thing. It means no more crusty shower heads, no more film on your glasses, and your skin will feel like a baby dolphin’s belly.
Don’t worry, you don’t need a chemistry degree. You just need to know a few simple steps. Think of it like feeding a very thirsty robot that lives in your garage.
Must Read
Step 1: The Salt Bank (It’s Not Cryptocurrency)
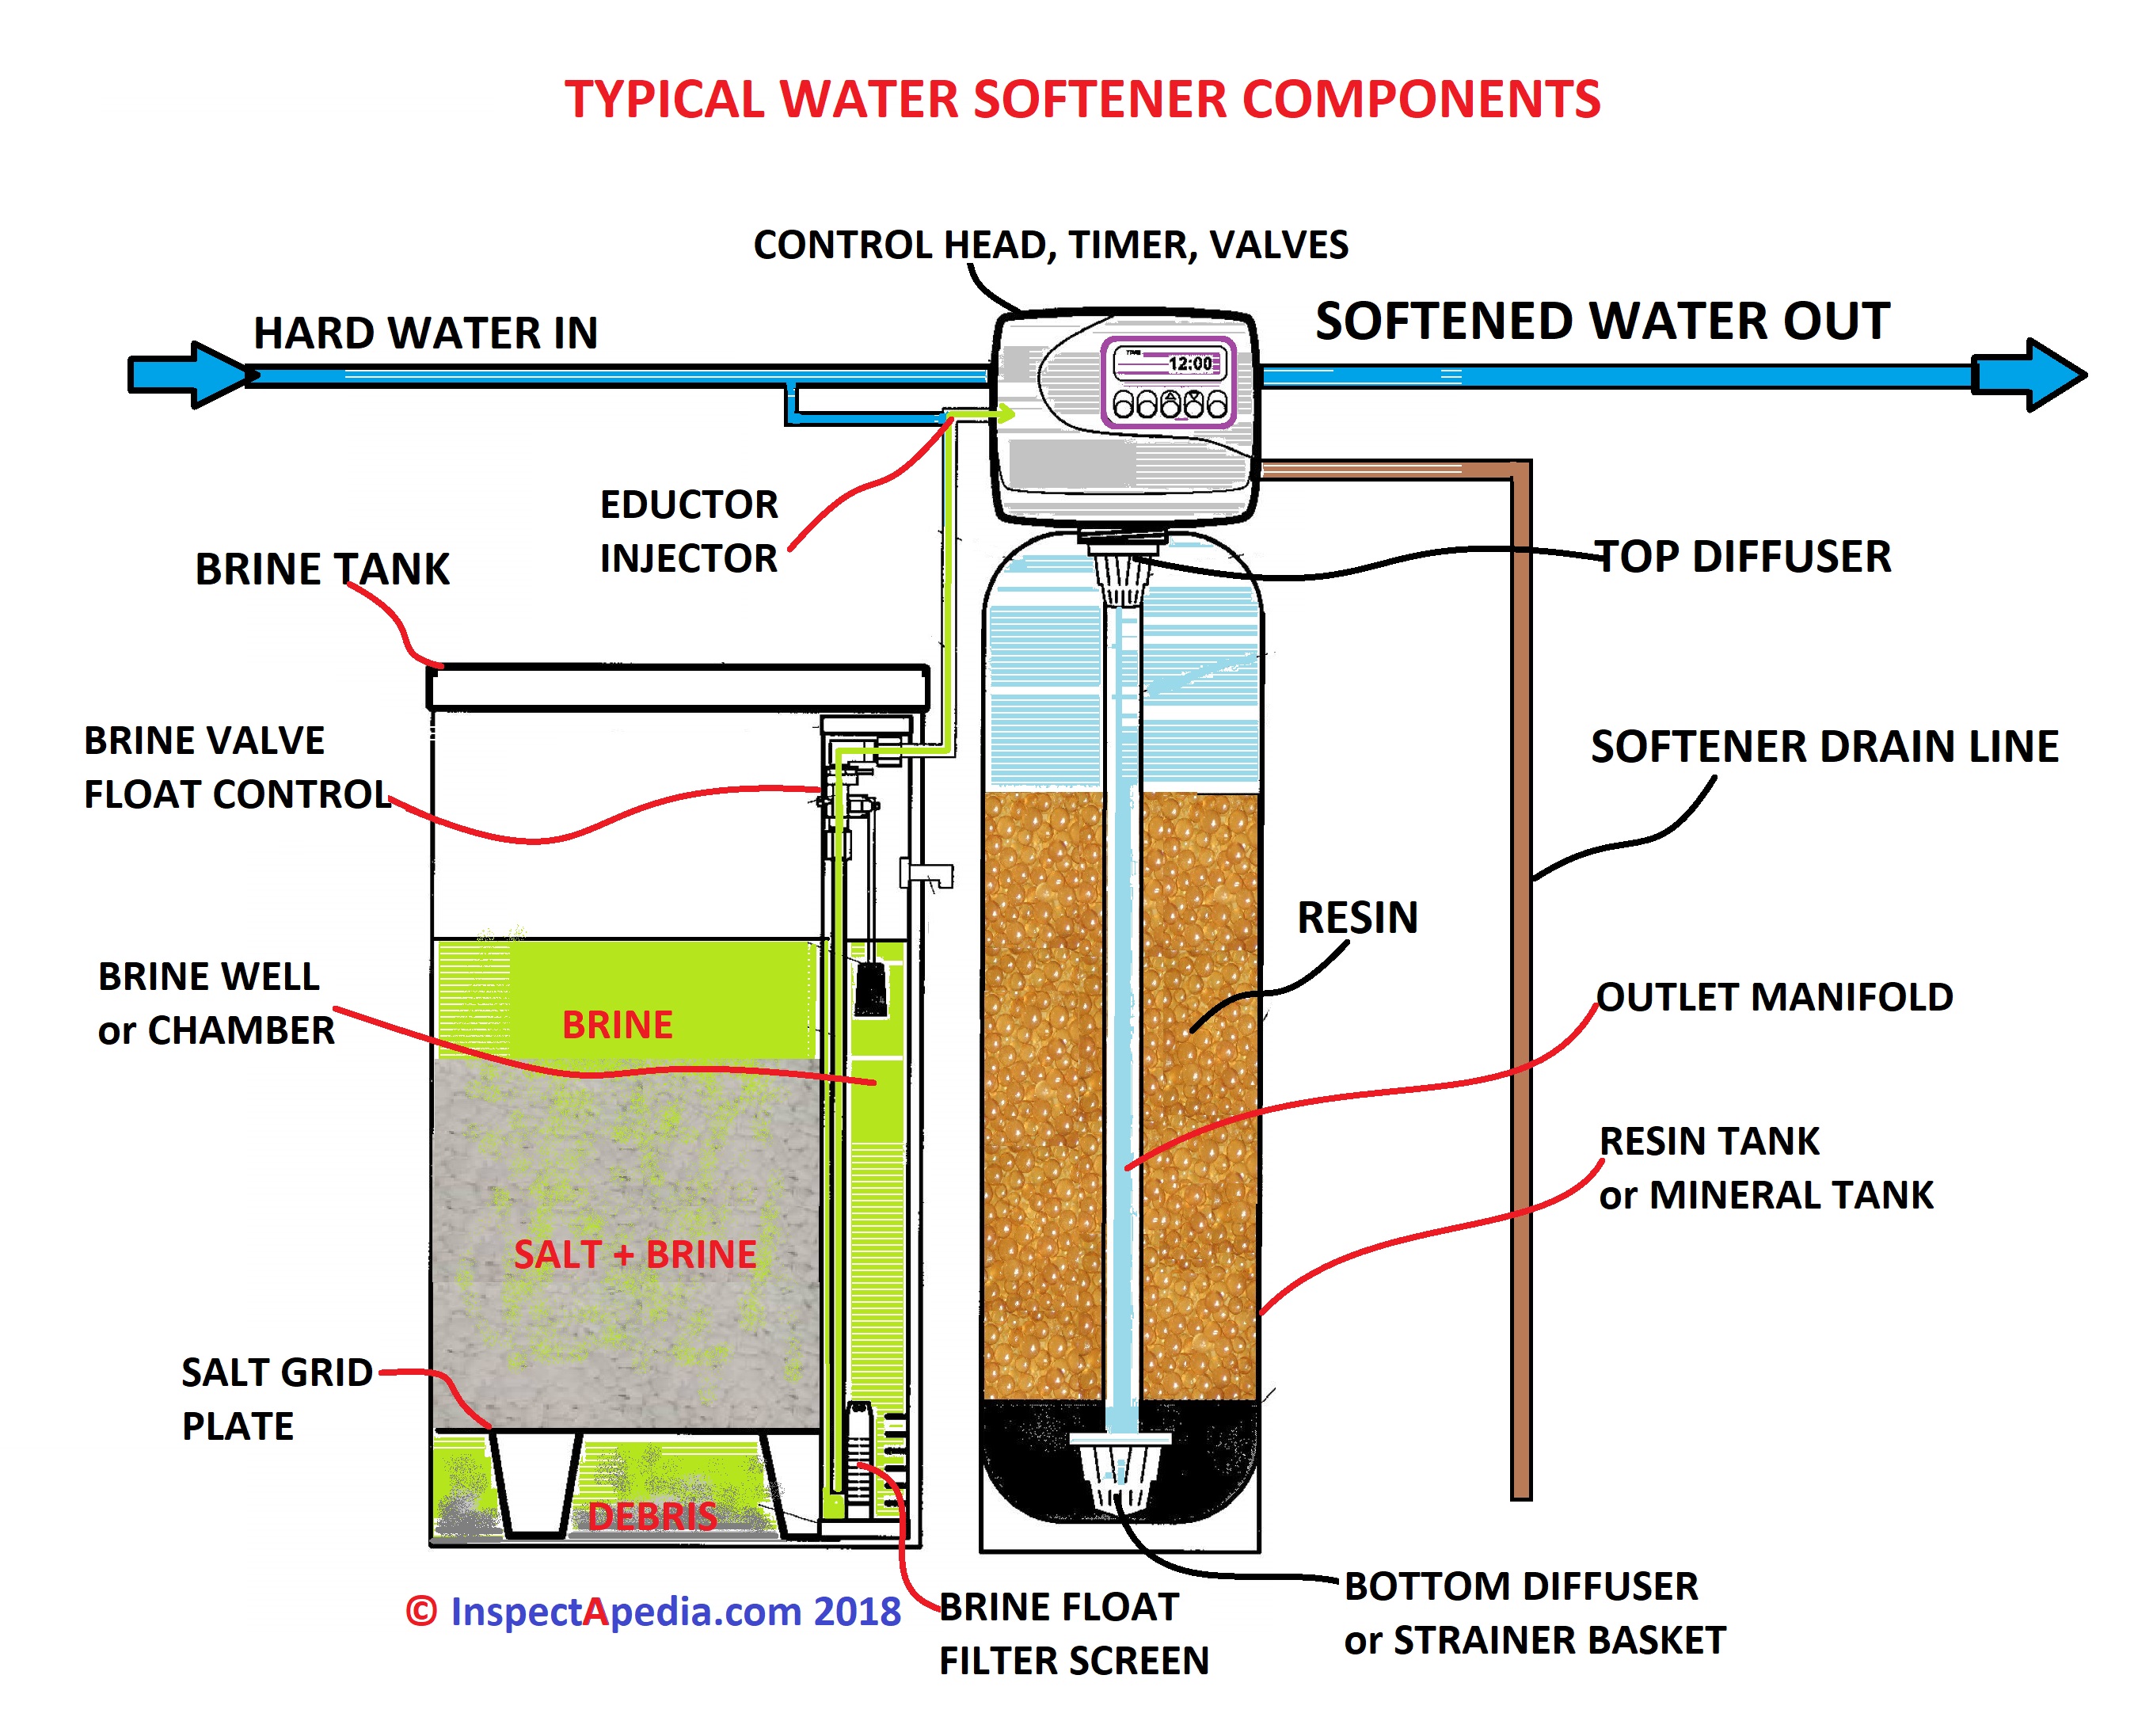
The most important job you have is keeping your softener’s salt tank full. Seriously, this is 90% of the work. If you run out of salt, your softener throws a tantrum and stops softening. Your water goes back to being rock-hard, and your soap will throw a fit.
So, how often? Check the salt level once a month. Just peek inside the tank. Is the salt pile looking low, like a sad, melting snowman? Time for a refill. Don’t overthink it. Lift the lid and dump a fresh bag of salt in. It’s like feeding a giant, thirsty bird.
Step 2: What Kind of Salt? (Yes, There’s a Decision)
You’ll find a few types at the store. Solar salt is the most common—it’s cheap and works great. Evaporated salt is the “fancy” stuff, super pure, and less likely to leave sludge. Block salt is a thing, but stick to pellets for now.
Honestly, just buy whatever bag is on sale. Your softener won’t judge you. It’s not a picky eater. But do avoid rock salt from the driveway—that stuff has dirt and will gum up your machine. Nobody wants a dirty robot.
Step 3: The Control Panel (Don’t Panic)
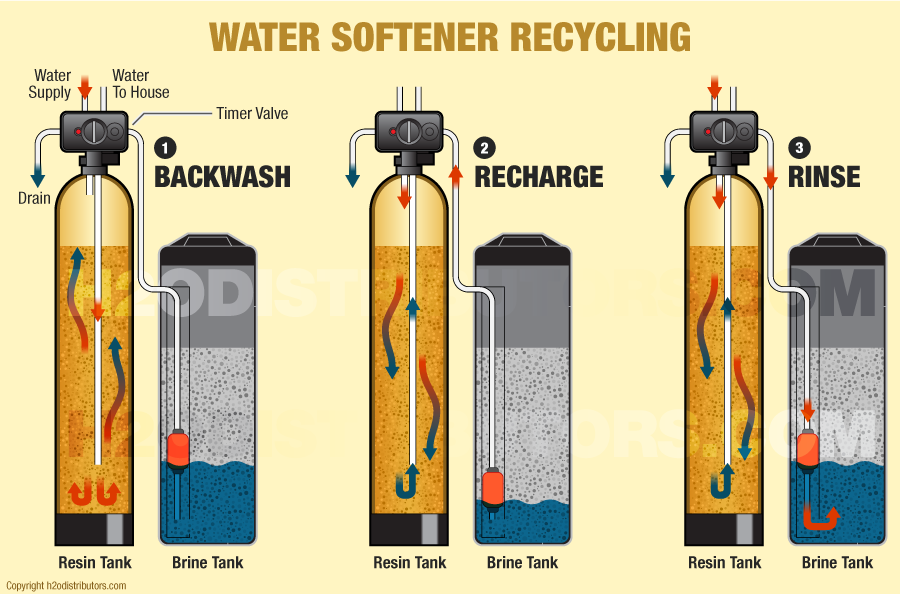
Most modern softeners have a little screen, kind of like a tiny microwave. It’ll show a few numbers and buttons. Your main jobs here are: setting the time and knowing the “regeneration” cycle. That’s when the machine cleans itself using salt water.
Set the clock to the correct time. This is crucial because you want regeneration to happen at 2:00 AM, not when you’re singing in the shower at 8:00 PM. Trust me, a mid-lather shower interruption is not fun. It’s like getting a parking ticket while you’re already parked.
 How To Operate A Water Softener System at Ronald Pepper blog
Step 4: The “Regen” Button (Your New Friend)
If you accidentally run out of salt, or if the water suddenly feels “hard” again, you can hit the “Manual Regeneration” button. It forces your softener to clean itself immediately. It’s the equivalent of hitting the “reset” button on a grumpy video game.
Don’t be scared to press it. It will make a gurgling noise for an hour, then flush some water down a drain. That’s normal! It’s just the robot taking out the trash. It sounds like a dragon having a drink, but it’s fine.
Step 5: The Bypass Valve (The Emergency Exit)
Every softener has a little knob or lever called a bypass valve. If you ever need to water your garden or wash the car, flip that lever to “Bypass.” This sends the water around the softener, keeping all that salt out of your petunias. Plants hate salt. They’re very dramatic about it.
Also, if you ever need to move the machine or fix a leak, use the bypass. It’s like putting a “Do Not Disturb” sign on your plumbing. Very handy.
Step 6: The “Bleeding” Sound (It’s Not Vampire Related)
After you install a new softener or run out of salt, you might hear air sputtering from your faucets. This is annoying but harmless. Just run a cold water faucet for 5-10 minutes. That burping sound will stop eventually. It’s the water softener burping after a big meal of salt.
You can also open a few faucets at once to speed it up. Think of it as letting the pipes take a deep breath. Easy fix, no call to the plumber needed.
 Water Softener Piping Diagram How Softeners Work | Water Softener
Pro Tips for the Champions
Here’s the secret sauce: Clean your salt tank once a year. It collects a muddy sludge at the bottom called “salt mush.” Just scoop it out with a plastic cup. It’s gross, but satisfying, like cleaning a very wet sandbox.
Also, if you have an iron problem in your water, look for “rust-removing” salt. It’s got special chemicals that help break down the orange stains. Your shower curtain will send you a thank-you note. Don’t forget to wipe down the top of the tank occasionally. Salt dust gets everywhere.
What if Something Goes Wrong? (The Panic Checklist)
Is your water still hard? Check the salt level first. 90% of problems are solved by adding salt. Is the machine not making noise? Check if it’s plugged in. Yes, we’ve all forgotten that. Is there water on the floor? Your drain line might be clogged. Unplug it and clean it with a pipe cleaner.
Still stuck? Google the model number. There’s a YouTube video for everything. Someone has definitely dropped a sock in their salt tank before. You are not alone.
One last thing: don’t stress about the salt bridge. That’s when salt hardens into a crust on top of the water. Just poke it with a broom handle to break it up. Problem solved.
You’ve Got This!
And that’s really all there is to it. You don’t need to be a plumber or a chemist. You just need to remember two things: keep salt in the tank, and press the regen button if something feels off. The softener does the real heavy lifting. It’s like having a personal assistant for your pipes.
So go ahead, take the longest, most luxurious shower of your life. Admire your spotless glasses. Feel that silky-smooth hair. Because you, my friend, have just tamed the hard water beast. You’re the master of your own mineral destiny. Your dishes will sparkle, your laundry will be fluffy, and your coffee will taste like it’s from a fancy café. Now go enjoy your soft life. You earned it.
