How To Purify Rain Water

So, you’ve decided to catch a little sky-water. Maybe you’re prepping for the apocalypse, or perhaps you just want to water your prize-winning petunias with something fancier...

So, you’ve decided to catch a little sky-water. Maybe you’re prepping for the apocalypse, or perhaps you just want to water your prize-winning petunias with something fancier than tap water. Either way, welcome to the club of DIY rain collectors.
Let’s be real: rain is nature’s shower, but it picks up a lot of hitchhikers on the way down. Dust, bird droppings, roof tar, and the occasional confused mosquito egg are all part of the "cloud juice" package. Don’t worry—we’re going to turn that muddy mess into something you’d actually want to drink or use.
Step 1: Catch It Like a Boss
First, you need a clean catchment surface. Please don’t use your gutter full of last autumn’s leaves. A simple food-grade barrel or a clean tarp works wonders.
Must Read
Remember: never collect the first flush—those first few minutes of rain are basically the sky washing its dirty socks. Let that run off for about ten minutes, then start collecting. Your future self will thank you.
The "First Flush" Diverter
You can buy a fancy first-flush diverter, or you can be a genius like me and use a downspout with a simple ball valve. It’s basically a rain-spitting robot that says, "Nope, not clean enough yet."
If you’re feeling lazy, just throw a bucket under a clean tarp. Hack the planet, right?
Step 2: Settle Down, Sediment
Your collected rain is now a murky smoothie of dirt and tiny bugs. Don’t panic. Let it sit for 24 hours so the big chunks sink to the bottom.
This is called "sedimentation." It’s basically a siesta for your water. After a day, pour off the clear top layer into another container, being careful not to stir up the sludge kingdom at the bottom.
Pre-Filter for the Brave
If you’re fancy, pour it through a clean cotton cloth or an old t-shirt. It’s like making a giant tea bag, but with mud. Just don’t use a sock you wore yesterday—we have standards here.
 10 DIY Rainwater Purification Methods for Safe Drinking - Eco Home Genius
Step 3: Boil It or Bust It
Okay, now the serious part. Boiling is the gold standard for killing bacteria and viruses. Bring your clear-ish rain to a rolling boil for at least one minute (three minutes if you’re at high altitude—science, baby!).
Let it cool, and boom: you’ve got sterile water. It tastes a little flat, so add a pinch of salt or swish it in a bottle to reintroduce oxygen. Fancy, huh?
The Microwave Cheat
Yes, you can boil small amounts in a microwave-safe container. Just be careful not to superheat it (that’s when water explodes in your face—not fun). Use a chopstick to break the surface tension. You’re welcome.
Step 4: The Chemist Route (No Lab Coat Needed)
If you’re bug-out bagging or camping, you can use bleach. Seriously. Add 8 drops of unscented household bleach (5-6% sodium hypochlorite) per gallon of clear water.
Stir it, wait 30 minutes, and if it smells faintly of chlorine, you’re good. If it smells like a swimming pool, you messed up. Drain and start over—no one wants chemical soup.
Iodine Tablets (The Backpacker’s BFF)
These little lifesavers are cheap and effective. Follow the directions on the bottle, but generally, drop one in a quart, wait 20 minutes, and bam—drinkable water. It tastes a bit like a doctor’s office, but it’s safe.
Step 5: Filter Like a Pro
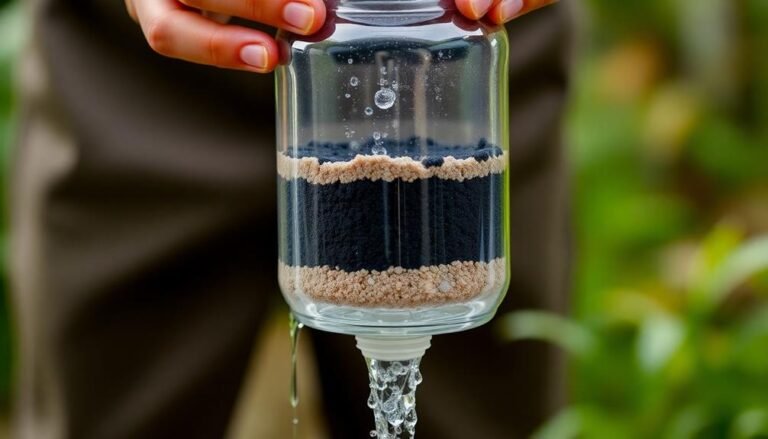
For the ultimate purification, combine methods. Boil first, then filter through a carbon filter (like a Brita or a cheap camping filter). This removes any leftover chemicals, weird flavors, or mysterious floaty bits.
 How To Filter Rain Water To Drink: Safe & Easy Methods Explained - RO
You can also build a DIY sand and charcoal filter, but that’s a whole other rabbit hole. I recommend just buying a filter and pretending you’re a survival guru on YouTube.
The "Emergency Only" Trip
If you’re desperate and have no fire or tablets, let the rain water sit in direct sunlight for six hours in a clear plastic bottle. This is called Solar Disinfection (SODIS). It kills most microbes, but it’s not perfect. Use only if you’re stranded and the only option is drinking puddle juice.
What NOT to Do (The "Oops" List)
Don’t drink straight from a rusty roof—tetanus is not a good party trick. Don’t use bleach that has added scents or thickeners. And never distill if you don’t know what you’re doing (you’ll get weird concentrated metals).
Oh, and don’t collect water during a chemical fire or a volcanic eruption. That’s just bad luck and bad science.
The Grand Finale: You Did It!
So you’ve gone from a muddy barrel to a glass of clear, purified rain. It might sound like a lot of steps, but honestly, it’s mostly just waiting and dodging your own clumsiness. You’ve outsmarted the sky.
Now you can sip your homemade sky-water and feel like a wizard. You’re not just drinking H₂O; you’re drinking a memory of a cloud, a kiss from the atmosphere, and a victory over boredom. You are a rain-whisperer, a puddle-shaman, a hydration hero.
Go ahead, raise that glass. Here’s to you, the planet, and the weird, wonderful act of turning weather into a drink. May your barrel always overflow, and your filters never clog. Cheers, you magnificent rain-catcher!
